
Ashlar Masonry Wall: Units, Joints and Patterns
Identify ashlar stonework, compare coursed, random and stacked layouts, and distinguish the visible pattern from wall structure and joint dimensions.
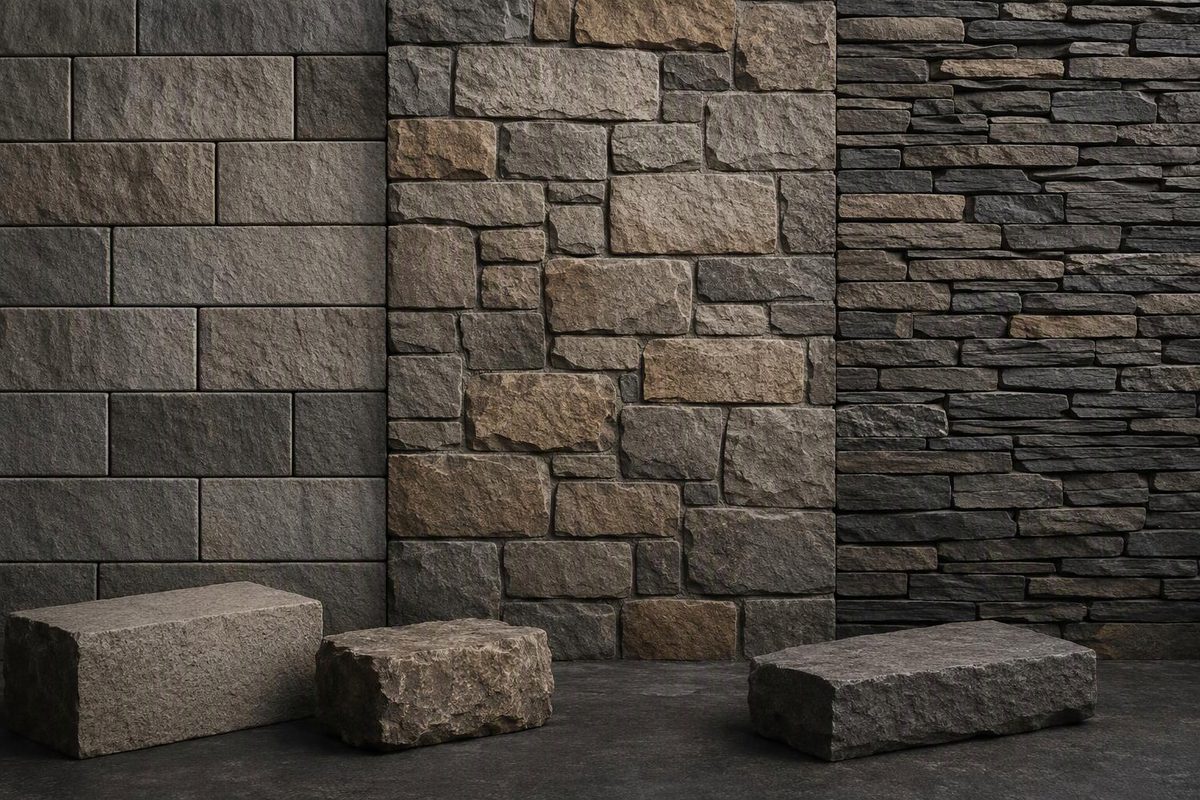
An ashlar masonry wall uses stone units worked into generally square or rectangular shapes, with sawn or dressed bedding surfaces. The defining feature is the preparation of the units—not a particular stone species, block size or perfectly smooth exposed face. The Marble Institute of America’s Illustrated Glossary of Stone Industry Terms distinguishes coursed, random and stacked ashlar layouts. (MIA glossary, 2016)
Ashlar does not, by itself, identify the wall’s structural role. Traditional ashlar can form load-bearing stonework; stone veneer is a non-load-bearing facing. A rectangular stone façade therefore cannot tell you what supports the floors or roof, how thick the stone is, or how it connects to the backing. Those answers require a wall section or investigation of the construction. (Historic Environment Scotland; MIA glossary)
Identify the layout and finish separately
| Layout | What to look for |
|---|---|
| Coursed ashlar | Continuous horizontal joints forming rows, or courses |
| Random ashlar | Square or rectangular units of varying lengths and heights, without continuous horizontal or vertical joints |
| Stacked ashlar | Units arranged to form continuous vertical joints |
These are layout distinctions, not structural ratings. Random ashlar is not random rubble: rubble units may be highly irregular or only partly trimmed or squared. Rubble can also be coursed, so horizontal rows alone do not establish that a wall is ashlar. (MIA glossary, entries for “Ashlar” and “Rubble”)
The exposed finish is another choice. Ashlar can have tooled or smooth faces, while rock-faced veneer has a split or chiselled face with a dressed perimeter. Rustication accentuates joints with chamfers or grooves; the resulting shadow line should not be mistaken for the width of the mortar joint itself. (Historic Environment Scotland; Ernest Maier stone terminology; MIA glossary, “Rustication”)
Read unit dimensions together with the joints
The word ashlar supplies no dimensions. For an order or drawing, distinguish:
- Actual unit dimensions: the stone’s length, height and depth, including stated tolerances.
- Installed module: the repeating dimension of the stone plus its specified joint.
- Joint geometry: the opening between units, separate from chamfers or other face treatments.
For a hypothetical coursed layout, a stone 200 mm high with a 5 mm bed joint gives a 205 mm repeating course module. This is a setting-out example, not a standard ashlar size or recommended joint width. If a supplier uses nominal dimensions, confirm whether its labels include the joints.
Historic ashlar needs particular care: Historic Environment Scotland describes traditional face joints only a few millimetres wide. It also notes that tapered blocks can leave joints wider inside the wall than at the face. A fine visible seam therefore does not reveal the full joint geometry. (HES ashlar guidance)
Before specifying a new wall, record the stone variety, unit dimensions, layout, face finish, mortar and joint finish. Then identify the actual masonry wall system: load-bearing masonry or veneer, its backing and support, connections, and water-management and movement details. “Ashlar finish” is not a complete wall specification.
Repointing an existing ashlar wall
For traditionally built ashlar, do not select replacement mortar solely from a mortar strength table. Compatibility with the stone, existing mortar and fine joint width matters.
Historic Environment Scotland recommends surveying the pointing first and leaving sound mortar in place. For the traditional Scottish buildings covered by its guidance, it calls for compatible lime mortar, warns against coarse aggregate that cannot enter fine joints, and says rotary tools such as angle grinders should never be used to rake them out. Narrow joints demand careful preparation rather than widening them to suit an ordinary pointing tool. (HES repointing guidance)
Existing cement pointing also needs assessment before removal. HES notes that sound cement mortar that resists removal may be better left in place if removing it would damage the stone; it should then be inspected regularly for signs of harm. (HES guidance on removing cement mortars)