
Retaining Wall Caps That Fit the Actual Wall
Caps may sit flush, project equally on both faces or be offset. For centered placement, subtract wall width from cap width and divide by two.
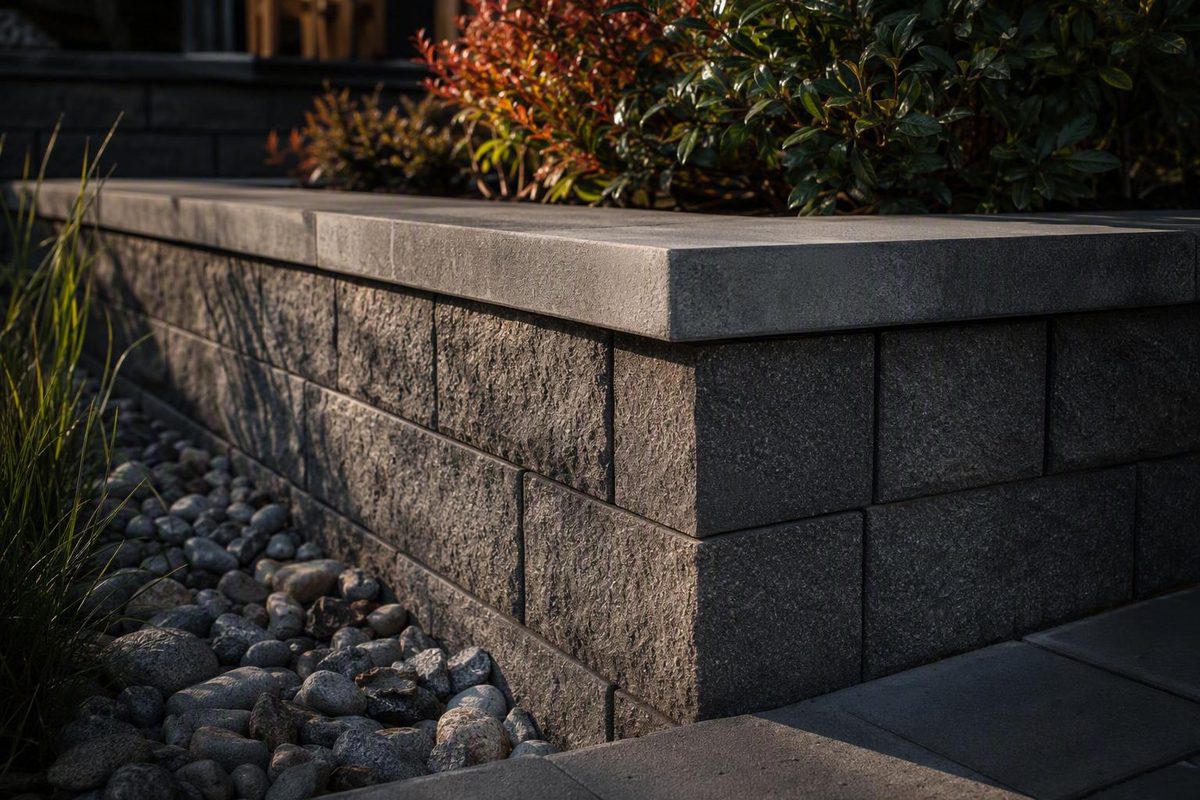
A retaining wall cap is highly visible, but appearance should not be the first selection criterion. Start with the wall’s actual dimensions, geometry, construction system, and exposure. Then compare cap dimensions, profiles, purchasing terms, and approved installation methods.
A cap that looks suitable in a catalog may still rock on the top course, conflict with a raised lip, create an unacceptable overhang, fail to follow a curve, or lack an approved bonding method for the substrate. The right retaining wall cap fits the built wall, works with the applicable system, allows practical joints and cuts, and can be installed under current product instructions.
This guide is a selection, measurement, layout, and purchasing overview. It does not replace a wall-system manual, bonding-product specification, structural assessment, workplace safety procedure, or applicable local requirement. Those project-specific documents control where they differ from general planning guidance.
What a retaining wall cap does—and what it cannot do
A retaining wall cap is the final horizontal course covering the exposed top of a retaining or freestanding wall. It creates a finished architectural edge and conceals open cores, joints, or other exposed upper surfaces. When the wall and cap are appropriately detailed, the cap may also help shield the surface beneath from direct exposure.
The cap may be flush with the wall faces or extend beyond one or both faces. Neither arrangement is universally correct. Placement should reflect the intended appearance, wall geometry, cap profile, water-management details, and applicable wall-system instructions.
A cap is not a structural repair. It cannot correct settlement, bulging, continuing movement, a failed base, damaged structural units, inadequate drainage, or an unstable supporting course. Adhesive may secure a compatible cap to a stable wall, but it does not make a deficient wall stable.
Terminology can complicate shopping. Retailers may group wall caps with:
- Coping, a term often used for pieces covering the top of a wall
- Seat-wall caps, which may be proportioned for sitting as well as finishing a wall
- Universal caps, intended for more than one product or layout
- Pillar or column tops, designed to crown a concentrated square or rectangular element
- Step or specialty caps, intended for transitions or other hardscape features
These categories overlap, but the products are not automatically interchangeable. Supplier catalogs may place retaining-wall caps, coping, seat-wall products, and pillar or column caps in the same category, which is why a commercial product name alone does not establish suitability (King’s Material cap catalog).
Treat a “universal” label as a reason to investigate, not as a promise that the cap fits every wall. Likewise, a pillar top that is wide enough to cover a wall may still have an unsuitable underside, edge treatment, thickness, corner geometry, or bonding requirement.
Not every compatible wall must be finished with a conventional capstone. Allan Block presents plantings, mulch, landscape rock, grass, or soil as finishing options for certain systems. Those alternatives depend on the block configuration and required edging details and should not be generalized to unrelated walls (Allan Block finishing options).
Measure the wall before shopping for a cap
Measure the completed or substantially completed wall rather than relying on a nominal product name or an old receipt. A nominal description also does not establish cap compatibility.
Use a field worksheet that records the following conditions.
| Field measurement | What to record | Why it matters |
|---|---|---|
| Actual wall width | Measure at several representative locations | Determines required cap depth and possible overhang |
| Total wall run | Measure along the intended cap line | Establishes the starting quantity |
| Straight sections | Record each run separately | Supports joint planning and balanced end cuts |
| Inside corners | Count and record the actual angle | May require cuts or specialty units |
| Outside corners | Count and verify the actual angle | Affects miters, waste, and joint placement |
| Curves | Record inside or outside radius where practical | Helps determine whether the selected cap can follow the wall |
| Wall ends | Note finished, buried, returned, or abutting ends | Controls terminal cuts and exposed edges |
| Pillars or columns | Record width, depth, and transition points | May require a separate top or cap size |
| Elevation changes | Record steps, slopes, and course changes | Affects visible transitions and cap thickness |
| Accessories | Mark conduits, lights, posts, railings, outlets, and drains | Prevents conflicts after bonding |
| Surface condition | Note high spots, damage, rocking units, or standing water | Identifies conditions requiring attention first |
Take width measurements at the ends, corners, transitions, and several points between them. A cap selected from one convenient measurement may not fit a wall that narrows, widens, bows, or changes construction type.
Calculate a centered overhang
If the cap is intended to project equally from both faces, use:
Overhang per face = (cap width − actual wall width) ÷ 2
This formula describes geometry only. It does not prove that the calculated projection is acceptable for the cap, wall system, exposure, or intended use. Confirm permitted dimensions and placement with the applicable manufacturer.
An offset cap requires a separate layout. If the design calls for a larger projection on the visible face and little or none at the back, do not automatically center the cap. Establish the two offsets independently:
Front overhang + rear overhang = cap width − wall width
During dry-fitting, mark the intended face line so the offset remains consistent along the run.
Consider all three cap dimensions
Width or depth governs coverage and overhang. It must accommodate the actual wall width and any system-specific restrictions.
Length affects the number of pieces and joints.
Thickness changes the visual weight of the top course and affects transitions. A thicker cap creates a stronger horizontal band; a thinner piece appears lighter. Thickness also matters where a wall meets steps, pillars, existing coping, or another elevation.
The edge profile can change the apparent dimensions. A rough split or rock-faced edge may project irregularly, while a straight or eased edge reads as a cleaner line.
Before applying adhesive or mortar, plan:
- Joint locations and intended joint treatment
- Balanced cuts at both ends of prominent runs
- Inside- and outside-corner details
- Curve cuts and likely taper
- Changes in cap width or thickness
- Transitions into pillars, steps, or adjoining walls
- Lighting recesses and conduit routes
- Clearances around posts, railings, and other accessories
Calculate pieces, linear feet, and extra material
For a simple straight wall, divide the measured run by the usable installed length of one cap:
Base piece count = wall run ÷ usable installed cap length
Round the result up to a whole piece. “Usable installed length” matters because the nominal product length may not equal the distance each piece contributes after joint treatment, trimming, or interlocking geometry is considered.
As a documented product example, some natural-stone caps measuring 12 by 24 inches are listed as providing 2 linear feet per piece. On that basis, a hypothetical 20-foot straight run would require 10 pieces before cuts and other allowances: 20 ÷ 2 = 10. Verify the actual coverage, orientation, joints, and cutting plan for the exact item before ordering (Wall & Tile natural-stone cap listings).
Do not treat the base calculation as the final order. Additional material may be needed for:
- Mitered corners
- Tapered curve cuts
- Balanced end cuts
- Breakage during transport or cutting
- Pieces found damaged during inspection
- Natural-stone color blending
- Size or thickness variation
- Revised joint locations
- Field changes at pillars or accessories
- Future replacement pieces
A long straight wall with square ends may require far fewer cuts than a short wall with several radii, pillars, and elevation changes. Estimate the actual geometry instead of applying an arbitrary percentage without a cut plan.
Quantity worksheet
Use a worksheet that separates calculated coverage from project-specific extras.
| Quantity component | How to determine it | Recorded amount |
|---|---|---|
| Straight-run base pieces | Divide each run by usable installed cap length; round each planned run as appropriate | |
| Outside-corner pieces | Lay out each corner and record the pieces consumed by miters or specialty units | |
| Inside-corner pieces | Record specialty units or cut pieces required | |
| Curve pieces | Dry-lay or diagram each radius and record the expected piece count | |
| Pillar or column tops | Calculate separately by top dimensions and selected product | |
| Transition pieces | Record steps, width changes, elevation changes, and wall returns | |
| Known unusable remnants | Identify cuts unlikely to produce reusable pieces | |
| Breakage or variation contingency | Select an amount based on handling, cutting complexity, and material variation | |
| Subtotal | Add all required and contingency pieces | |
| Package rounding | Round to the required carton, kit, layer, or pallet quantity | |
| Final order | Record the purchasable quantity |
For an irregular project:
- Calculate each straight section.
- Lay out each inside and outside corner.
- Estimate pieces consumed by each curve.
- Calculate pillars or column tops separately.
- Add transition and terminal pieces.
- Account for known unusable offcuts.
- Choose a project-specific contingency.
- Round to the seller’s available package quantity.
Keep units consistent when comparing products. Sellers may quote caps:
- Per piece
- Per linear foot
- Per square foot
- By pallet
- By kit
- As individual units
A square-foot figure describes surface area, while a linear-foot figure describes run coverage. They are not interchangeable. A pallet may contain more material than the project needs, while individual-unit purchasing may make cuts and replacements easier to manage.
When comparing quotations, convert each offer to the same basis. Include delivery, unloading, package rounding, cutting losses, bonding material, equipment, and pieces that cannot be used because their dimensions or appearance do not fit the layout.
Compare cap materials, finishes, and edge profiles
Documented cap categories include manufactured concrete, precast concrete, limestone, travertine, and other natural stones. Material category alone does not determine compatibility or performance. The exact product, supporting wall, exposure, detailing, and installation method remain decisive.
In this guide, manufactured concrete means modular caps produced as part of or alongside wall-block families. Precast concrete refers to separately specified architectural or project-oriented pieces, including special-order products. This is a purchasing distinction, not a claim that the two categories have universally different performance.
Manufactured and precast concrete
Manufactured concrete caps are commonly offered in named profiles and coordinated wall-system colors. These features can simplify shortlisting, but field verification remains necessary: a catalog dimension or matching color name does not prove that the cap will seat correctly on the built wall.
Concrete catalogs use profile names such as split-face, chiseled, straight-face, contemporary, and mini. Some products are associated with particular wall types or smaller blocks. Rochester Concrete Products, for example, lists split-face and chiseled products, a contemporary cap, and a Mini-Cap created for Cottage Stone and other smaller block walls (Rochester Concrete Products cap range).
The evidence also documents a special-order precast option. For any such product, verify lead time, actual dimensions, finish consistency, edge treatment, order minimums, underside geometry, and approved installation method.
Limestone, travertine, and other natural stone
Natural stone can provide color, veining, cleft, and surface texture integral to the material. Those same characteristics make inspection and blending important.
Documented variations include:
- Color and shade
- Veining or mineral markings
- Surface texture
- Cleft
- Length and width
- Thickness
Flatness, edge damage, and corner condition should also be inspected when material is delivered, but they should not automatically be accepted as normal variation without checking the seller’s specifications and terms.
Lay out natural-stone pieces before bonding so documented variation can be distributed intentionally. Avoid concentrating unusually light, dark, thick, or strongly marked pieces in one area unless that is part of the design.
Exposure deserves product-specific review. RCP Block & Brick identifies freeze-thaw cycling, salt, wetting and drying, oxidation, thermal expansion, dissolution, and possible spalling or flaking among factors that may affect natural stone. These disclosures do not predict the performance of every stone, but they show why stone type, climate, site exposure, and seller terms should be reviewed before purchase (RCP Block & Brick wall-cap catalog and stone disclosures).
Understand profile vocabulary
- Split-face generally indicates a rough, fractured-looking face.
- Rock-faced describes an edge intended to resemble naturally broken or worked stone.
- Eased indicates a softened edge rather than a sharp arris.
- Chiseled suggests the appearance of worked stone.
- Contemporary generally denotes a cleaner, simpler visual line.
- Bullnose is a rounded-edge product designation.
Always inspect a drawing, sample, or actual piece.
Material and purchasing comparison
| Material category | Dimensional consistency to verify | Profile examples | Natural variation | Exposure questions | Compatibility checks | Purchasing constraints |
|---|---|---|---|---|---|---|
| Modular manufactured concrete | Actual width, length, thickness, underside, and stated tolerance | Split-face, chiseled, straight-face, contemporary, mini | Color and texture may vary by production run | Climate suitability, moisture limits, salt or chemical exposure | Named wall system, setback, pins or lips, approved adhesive | Regional colors, pallet quantities, individual-unit availability |
| Architectural or project-oriented precast concrete | Casting dimensions, underside, thickness, and end geometry | Straight, formed, smooth, or project-specific edges | Verify color and finish consistency | Approved installation environment and exposure limits | Substrate, joints, bonding method, transitions | May be special order or have extended lead times |
| Limestone | Width, length, thickness, and edge geometry | Rock-faced, eased, modern, or straight treatments | Color, veining, texture, cleft, size, and thickness may vary | Freeze-thaw, salt, oxidation, wetting and drying | Wall width, bonding-product approval, corner fabrication | Restrictive returns, regional stock, inspection needs |
| Travertine | Dimensions, thickness, and edge finish | Eased, modern, straight, or fabricated edges | Color, veining, pores, texture, and thickness may vary | Moisture, freeze-thaw, salt, chemicals, and thermal cycling | Substrate and bonding-product approval | Warehouse restrictions, matching lots, return terms |
| Other natural stone | Every stated and actual dimension | Split, sawn, thermal, eased, rock-faced, or custom | Depends on stone type and fabrication | Climate, moisture, salts, oxidation, heat, and chemicals | Stone type, wall system, joint design, approved bond | Availability, freight, fabrication, replacement matching |
Do not rank these categories broadly by service life, maintenance, crack resistance, value, or overall durability. Meaningful comparison requires current technical information for the exact products and conditions under consideration.
Confirm compatibility and purchasing terms
Matching cap width to wall width is necessary, but width alone does not establish compatibility.
Use this checklist before ordering:
- [ ] The actual wall width has been measured at multiple locations.
- [ ] Cap depth covers the wall with an acceptable front and rear overhang.
- [ ] Cap length works with the planned joints, corners, and ends.
- [ ] Cap thickness works at steps, pillars, and elevation changes.
- [ ] The underside seats correctly on the top course.
- [ ] Pins, lips, cores, recesses, or other wall features do not prevent seating.
- [ ] Wall setback has been considered.
- [ ] The proposed overhang is permitted for the system.
- [ ] Corner units or practical cut details are available.
- [ ] The cap can follow the required curve radius.
- [ ] The bonding material is approved for the cap and substrate.
- [ ] Required colors or production lots are available.
- [ ] Manufacturer approval has been obtained where required.
- [ ] Joint treatment and any applicable movement details have been resolved with the appropriate product supplier or project professional.
- [ ] Accessory penetrations and mounting points have been planned.
System-specific products demonstrate why these checks matter. Conversely, “universal cap,” “coping,” “seat-wall cap,” “pillar cap,” and “column cap” are overlapping commercial descriptions, not guarantees of interchangeability.
A documentation checklist by wall type
| Supporting wall | Documents or information to obtain before purchase |
|---|---|
| Proprietary modular block | Current wall-system manual, compatible cap list or cap drawing, curve and corner details, approved adhesive specification |
| CMU masonry | Actual built width, top-course condition, cap underside drawing, approved mortar or adhesive specification, project-specific joint details |
| Brick masonry | Actual wall geometry, substrate condition, compatible cap and bonding specification, corner and end details |
| Poured concrete | Actual width and level, surface-preparation requirements, compatible bonding system, transition and joint details |
| Natural-stone wall | Stable bearing surface assessment, actual irregular geometry, cap fabrication details, compatible bonding method |
This table identifies what to verify; it does not establish that any particular cap fits a given wall type.
Check how the cap is sold. It may be available:
- Individually
- By full pallet
- In a kit
- Through special order
- Only at selected stores
- Only from a regional warehouse
- In packaging that varies by market or production period
Confirm the following in writing where they materially affect the purchase:
- Current price and quote expiration
- Pack or pallet quantity
- Minimum order
- Freight and unloading arrangements
- Breakage procedure
- Special-order status
- Return and exchange rights
- Restocking charges
- Product warranty
- Availability of matching replacement pieces
- Whether opened packages or natural stone can be returned
These terms are particularly important for variable materials. RCP Block & Brick states that its natural-stone products are sold as is, are non-returnable and non-exchangeable, and carry no expressed or implied warranty. That is one supplier’s stated policy, not a universal stone-industry rule (RCP Block & Brick purchasing disclosures).
Where color or natural variation matters, ask whether samples or in-person inspection are possible. Do not assume samples are available or that a small sample represents every piece. If material comes from multiple lots, decide whether the differences are acceptable and blend the pieces during dry layout.
Prices, result counts, packaging, inventory, delivery, and store availability can change with time and location. Treat category pages as evidence of possible options, not as real-time quotations or confirmation that a selected product can be delivered to the site.
Prepare, dry-fit, and bond the cap course
Begin with a stop-work inspection. Before concealing the top course, look for:
- Continuing movement
- Bulging or leaning
- Settlement
- Cracks associated with wall movement
- Broken or displaced units
- An uneven or unstable top course
- Standing water
- Blocked drainage paths
- Debris or soil on the bonding surface
- Unresolved water entering or accumulating behind the wall
Do not install a cap over a condition requiring repair or professional assessment. Rocking units and wide adhesive beds are not substitutes for a sound supporting course.
For a new modular-block wall, complete the required courses, backfilling, and compaction before securing the capstones. Cut and dry-fit the cap units before adhesive is applied.
General installation sequence
The following sequence is for planning. Current instructions for the selected wall, cap, and bonding product control the work.
- Inspect the wall. Resolve stability, drainage, damage, and level problems.
- Clean the top course. Remove dust, dirt, loose material, and residue.
- Meet the bonding product’s moisture requirements. Do not assume every product has the same dry-surface rule.
- Establish reference lines. Mark the front edge, centered position, or deliberate offset.
- Dry-fit critical pieces. Begin with corners, ends, curves, pillars, and transitions.
- Lay out the remaining run. Balance joints and avoid conspicuously small pieces.
- Mark the cuts. Label every piece and its orientation.
- Cut under the applicable product, tool, and worksite instructions.
- Test-fit the cut pieces. Check seating, joints, overhang, and face alignment.
- Apply the approved bonding material.
- Replace each cap in sequence. Press it into position without losing the layout.
- Check alignment and level. Make only adjustments permitted while the bond remains workable.
- Clean excess material as directed.
- Protect the installation. Prevent movement, loading, or accessory work until the specified cure has been achieved.
Dry-fitting reveals problems before the work becomes difficult to reverse. It helps maintain consistent overhangs, distribute joints, balance end cuts, avoid narrow fragments in prominent locations, and identify units that rock or conflict with wall geometry.
Adhesive and mortar are different installation paths
Modular-wall guidance commonly describes compatible landscape-block, construction, or masonry adhesive. A separate retrofit masonry approach may use mortar. These paths should not be treated as interchangeable simply because either material can appear beneath a cap.
For one product-specific example, Loctite’s illustrated PL500 method calls for two adhesive beads, one positioned 2 inches from the front and one 2 inches from the back of the cap. That pattern applies to the illustrated product and method; it is not a universal bead layout (Loctite capstone installation guide).
A third-party retrofit guide for older masonry walls describes placing caps in an approximately 1/2-inch mortar bed and treats concrete bond adhesive as optional. This is a narrowly attributed DIY method, not a general specification for proprietary modular systems or all masonry substrates (DoItYourself mortar-set capping guide).
For the selected adhesive or mortar, verify:
- Approved cap materials
- Approved substrates
- Surface preparation
- Primers or bond agents, if any
- Bead or mortar-bed configuration
- Permitted application temperature
- Moisture limitations
- Working and adjustment time
- Joint treatment
- Cleanup method
- Cure time
- Restrictions on loading or exposure
Do not install lights, railings, seating accessories, or other loads until the bonding system has cured as specified.
Cutting-safety callout: The evidence summarized here is not a complete cutting-safety procedure. Before cutting, obtain and follow the current instructions for the tool, cap material, and worksite. Determine from those instructions what personal protective equipment and masonry-dust controls are required; do not assume one saw, blade, PPE set, or control method is suitable for every product. General cap-installation guidance also identifies safety equipment as part of the work, but project-specific instructions remain necessary (Rochester Concrete Products installation overview).
Lay out outside corners and curved walls
Corners and curves should be designed before quantities are finalized because they create more cuts and potential offcuts than uninterrupted straight runs. The following layouts are from Allan Block and may depend on its cap shapes. Other manufacturers may require different cuts or specialty units.
Typical outside corner
For Allan Block’s typical outside-corner layout:
- Place the two meeting caps in their intended positions.
- Check the overhang on both wall faces.
- Mark opposing 45-degree cuts.
- Make the cuts under the applicable tool and cap instructions.
- Return both pieces to the wall.
- Check the miter, face alignment, overhang, and seating.
- Refine the fit if permitted.
- Bond the caps only after the corner and adjacent joints are satisfactory.
Do not assume the built corner is exactly 90 degrees. Dry-fitting exposes deviations before bonding.
Broad curve: three-cap method
For a broad curve:
- Position two caps on the wall with enough room for a third.
- Place the center cap over the two positioned caps.
- Mark the overlap lines on the underside of the center cap.
- Remove the center cap.
- Cut along the transferred marks.
- Return it to the wall and test the three-piece fit.
- Repeat the process around the curve as necessary.
This field-transfer method uses the actual overlap rather than relying only on a theoretical radius.
Tighter-radius method
For Allan Block’s tighter-radius layout:
- Place two caps on the wall with their backs touching.
- Measure the front gap and call that distance x.
- Mark x ÷ 2 on the back of each cap.
- Draw a cut line from each back mark toward the corresponding front corner.
- Cut and return both pieces to the wall.
- Check the joint and repeat as needed.
Allan Block specifies a masonry saw for this procedure. That product-specific direction should not be converted into a universal saw or blade recommendation for every cap material. The opposing 45-degree corner cuts, three-cap curve layout, and x ÷ 2 tighter-radius method are documented in its system guidance (Allan Block corner and curve instructions).
Repeated dry-fitting is important around any radius. Check that:
- Joint widths remain visually consistent
- Front faces form a smooth progression
- Overhang does not wander
- Cap edges do not create abrupt steps
- Each piece seats securely
- Cut fragments remain suitable for the applicable system
- The final piece does not force an awkward closure joint
The number of cuts can increase quickly on a tight curve. Include those losses in the material order instead of calculating quantity only from the wall’s overall length.
Final checks, common problems, and when to call a professional
Inspect the complete course while adjustments remain possible, then inspect it again after installation.
Final cap-course checklist
- [ ] Front and rear overhangs match the intended layout.
- [ ] Joint spacing is visually controlled.
- [ ] Cap faces form a coherent line.
- [ ] The course meets the specified level or project geometry.
- [ ] Every cap is securely seated.
- [ ] No cap rocks on the supporting course.
- [ ] Corners are aligned and properly fitted.
- [ ] Curves progress without abrupt changes.
- [ ] End cuts are balanced and complete.
- [ ] Pillar and elevation transitions are resolved.
- [ ] Exposed faces are clean.
- [ ] Edges are intact and acceptable.
- [ ] Excess adhesive or mortar has been removed as directed.
- [ ] Lighting, conduits, and accessories remain accessible.
- [ ] The course is protected for the required curing period.
Correct the cause within the limits of the wall and bonding system, or obtain an assessment.
Stop work if the wall shows continuing settlement, bulging, movement-related cracking, standing water, failed drainage, displaced units, or an unstable top course. A new cap can cover the top surface, but it cannot remove the forces causing those conditions.
Complex, tall, sloped, tiered, or heavily loaded walls require project-specific guidance and may need an experienced hardscape professional or engineer. There is no universal height threshold for every wall. RCP Block & Brick directs users to obtain additional guidance for walls exceeding 36 inches and for sloped, retained-slope, or tiered conditions (RCP retaining-wall installation guidance).
A separate Rochester Concrete Products guide recommends consulting an engineer or experienced hardscape professional for walls over four feet or carrying heavy loads. These are different source-specific triggers, not a combined rule; the applicable wall-system instructions and local requirements control (Rochester Concrete Products professional-review guidance).
Special applications also require questions beyond a general cap specification:
- Seat walls introduce edge-comfort and seating-geometry considerations.
- Steps introduce walking-surface and transition requirements.
- Poolside structures require project-specific review of traction, moisture, and chemical exposure.
- Fire features require review of heat exposure and material clearances.
- Water features create persistent wetting and water-management concerns.
- Integrated lighting requires advance planning for wiring, recesses, access, and mounting.
Before buying or installing, reduce the process to seven decisions:
- Measure the wall’s actual dimensions.
- Confirm cap and wall-system compatibility.
- Calculate pieces using usable installed length.
- Review exposure, availability, return, and warranty terms.
- Dry-fit the critical layout.
- Follow the approved bonding specification.
- Stop if the supporting wall is unstable.
The correct retaining wall cap is not simply the most attractive piece of the right nominal width. It is the cap that fits the actual wall, is acceptable for the system and exposure, can be laid out with workable joints and cuts, and can be secured under current product instructions.
How much should a retaining wall cap overhang?
There is no universal overhang. A cap may be flush, centered with equal projection on both faces, or deliberately offset, depending on the design and applicable product instructions.
For a centered layout, subtract the actual wall width from the cap width and divide the remainder between the two faces. Treat that result as a geometric calculation, not automatic approval.
Should retaining wall caps be glued or mortared?
It depends on the wall system, cap material, substrate, and project type. Modular-block systems commonly use a compatible landscape-block, construction, or masonry adhesive. Some retrofit masonry methods use mortar.
Follow the current instructions for the selected wall, cap, adhesive, or mortar. Those instructions should determine surface preparation, bead or bed arrangement, application conditions, working time, and curing.
How do you cut retaining wall caps around corners and curves?
The cut depends on the cap shape and wall system. One documented system uses mitered pieces at typical outside corners, an overlap-and-transfer method for broad curves, and a measured taper for tighter radii.
Other cap shapes may require different cuts or purpose-made corner pieces. Complete the layout under the selected manufacturer’s instructions and dry-fit every cut before bonding.
Can a cap or landscape-block adhesive repair an unstable retaining wall?
No. A cap and its bonding material cannot correct settlement, bulging, continuing movement, inadequate drainage, a failed base, or an unstable supporting course.
Stop installation and address the underlying wall condition. Depending on the wall’s loading, construction, and symptoms, that may require an experienced retaining-wall contractor or engineer.
What should I check before buying natural-stone wall caps?
Confirm the stone type, actual dimensions, thickness variation, edge profile, color range, veining, texture, and cleft. Inspect delivered pieces for condition and ask how the selected stone is expected to respond to relevant freeze-thaw conditions, salt, repeated wetting and drying, oxidation, thermal changes, pool chemicals, or other site exposure.
Also review lot consistency, warehouse location, freight, breakage procedures, replacement availability, and return and warranty terms. When inspection is available, dry-lay the pieces and blend documented natural variation before bonding.