
Limewash Paint on Brick If the Surface Is Ready
Traditional limewash generally cannot bond directly to conventional paint or sealer. Surface checks show when to repair, use a test patch or choose another coating.
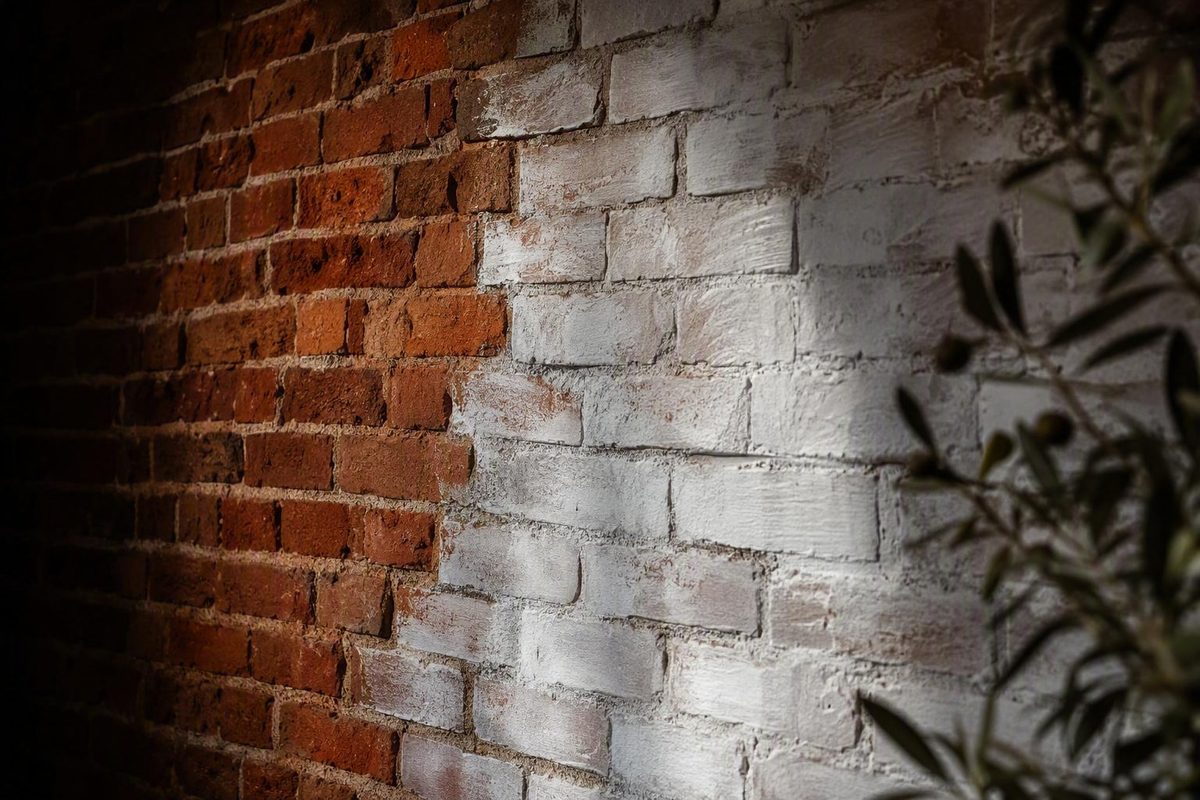
Limewash can soften red or orange brick, preserve its texture, and create anything from a translucent veil to comparatively full coverage. But a successful result depends on more than choosing a color and following a generic “lime wash paint brick” recipe.
First determine whether the brick, mortar, prior treatments, and selected product are compatible. Then investigate deterioration and moisture. Only after those questions are resolved should you decide how much brick to conceal, how much variation to accept, and which application method can deliver the intended finish.
Bare, sound, absorbent masonry is generally the clearest candidate. Painted, sealed, glazed, soft, historic, contaminated, or deteriorated brick requires more investigation. In every case, use a representative test patch and follow the selected product’s current label and technical instructions.
What limewash is—and why it is not ordinary brick paint
Traditional limewash is a mineral coating commonly made from slaked lime and water, sometimes with pigments or formulation-specific additives. It behaves differently from conventional acrylic or latex masonry paint.
On compatible porous masonry, the lime binder cures through carbonation: it reacts with carbon dioxide and converts toward calcium carbonate. The coating develops within and across the receptive mineral surface rather than curing solely as a continuous plastic-like film. A manufacturer comparison of limewash and mineral masonry paint describes the slaked-lime composition and carbonation process, although its broader performance comparisons remain manufacturer claims.
The main finish categories differ in both material and appearance:
- Limewash generally follows the texture of brick and mortar. It tends to look matte, variable, mottled, or softly weathered.
- Conventional acrylic or latex masonry paint normally forms a more continuous, opaque film. It can conceal more variation and produce a more uniform color.
- Mineral silicate paint is a separate mineral coating system with a potassium-silicate binder. Manufacturers commonly position it as a more opaque and uniform alternative, subject to product and substrate compatibility.
- Paint-based whitewash commonly means diluted conventional paint. A translucent appearance does not turn it into limewash.
Limewash is often described as vapor permeable or “breathable.” In practical terms, a compatible system may permit more water-vapor movement than a relatively impermeable film. That does not waterproof the wall or make it immune to bulk-water leaks, soluble salts, chronic saturation, poor drainage, or freeze-related deterioration.
The word limewash also does not identify one standardized formulation. Traditional site-mixed limewash, premixed commercial limewash, modified lime coatings, and products marketed as lime paint may differ in binders, additives, substrate requirements, dilution, application, curing, weather limits, and maintenance. Those differences can affect both compatibility and vapor behavior.
Before purchasing, obtain the current label, technical data sheet, safety data sheet, and substrate-compatibility instructions. If those documents are unclear about painted brick, sealers, dense masonry, application weather, or curing, ask the manufacturer for written guidance.
Is your brick suitable? Use a condition-first decision tree
Bare, porous, unsealed brick is generally the most straightforward candidate for traditional limewash. Even then, suitability should not be assumed. Porosity varies with the clay, firing process, manufacturing method, weathering, repairs, and prior treatments. Mortar joints may absorb very differently from brick faces.
Use the following decision tree before selecting a product.
1. Is the brick bare, sound, and absorbent?
If the brick and mortar are uncoated, stable, reasonably clean, and visibly absorb water, proceed to a representative test patch.
Observe how several areas respond to a small amount of clean water.
This observation is only a screening clue. Test multiple bricks and joints because exposed, sheltered, repaired, and replacement masonry may behave differently.
The test patch should also be assessed after the product’s stated development period. Stop and seek product-specific advice if the coating beads, slides, separates, develops large bare areas, releases with light handling after the stated cure period, or behaves markedly differently over repairs and joints. These observations identify reasons not to proceed; they are not substitutes for a manufacturer-approved adhesion test.
2. Is the brick painted?
Traditional limewash generally will not bond directly to conventional paint because the paint prevents contact with receptive mineral masonry.
The practical options are:
- Investigate whether the paint can be removed without unacceptable masonry damage.
- Use a complete manufacturer-approved system specifically permitted over the existing coating.
- Choose another compatible coating designed for that surface.
Some manufacturers offer proprietary base coats for incompletely stripped masonry. That creates a product-specific coating system; it does not turn painted brick back into bare brick or restore the wall’s original vapor behavior. Meoded, for example, distinguishes direct application to porous unpainted brick from its base-coat route over remaining paint and acknowledges that the latter does not restore the behavior of bare masonry.
3. Is the brick sealed or treated with water repellent?
Traditional limewash may not absorb or attach adequately over a sealer. Possible clues include beading water, a slight sheen, highly uneven wetting, or maintenance records identifying a water-repellent treatment.
Do not attempt to defeat a suspected sealer by making the limewash thicker or applying more coats. Identify the treatment if possible, then ask both the limewash and sealer manufacturers whether an approved preparation or complete coating system exists.
4. Is the brick dense, glazed, polished, or unusually smooth?
Dense, glazed, or vitrified units may offer too little absorption for traditional limewash. Manufactured brick can also differ substantially between product lines.
If the surface is glossy, chemically treated, unusually smooth, or nearly nonabsorbent, obtain written manufacturer guidance or a masonry assessment.
5. Is the masonry soft, historic, handmade, reclaimed, or low-fired?
Older or softer brick is not automatically unsuitable for limewash, but the entire process requires greater caution.
Assess brick-face erosion, mortar hardness, previous repairs, replacement units, and the significance of the existing fabric. If the wall is historically important, visibly fragile, or difficult to replace, use small conservation trials and seek a specialist familiar with that masonry rather than relying on a general application guide.
6. Is the masonry damaged, damp, salty, or contaminated?
Stop before coating if you find:
- Crumbling or powdering brick
- Spalled or missing brick faces
- Loose or deeply eroded mortar
- Persistent dampness
- Repeated efflorescence
- Soot, oil, grease, or chemical contamination
- Biological growth that quickly returns
- Blistering, peeling, or unexplained failure of an earlier coating
These are substrate, contamination, or moisture problems—not color problems.
Assess brick faces and mortar joints together. Limewash crosses both. A sound field of brick with weak joints, or stable mortar surrounding deteriorated brick, does not provide a uniformly suitable substrate.
Repair the wall before changing its color
Limewash and paint are decorative finishes. Neither rebuilds a missing joint, stabilizes crumbling brick, closes a structural crack, removes salts, nor corrects a leak.
Inspect the full area before cleaning or testing:
- Cracks through brick, mortar, corners, arches, or openings
- Loose, recessed, cracked, or eroded mortar
- Spalling, scaling, flaking, or crumbling brick
- White deposits or recurring efflorescence
- Moss, algae, mildew, or other biological growth
- Persistent damp areas or interior staining
- Rust staining or failed embedded metal
- Bulging, displacement, or movement
- Peeling or blistering previous coatings
- Incompatible hard or dense repairs
- Open gaps around windows, doors, penetrations, and fixtures
If moisture is present, investigate where it enters and how the assembly dries. Possible paths include failed joints, defective flashing, leaking gutters or roof edges, damaged wall caps, cracks, failed sealants, poor site drainage, splashback, plumbing leaks, and excessive interior humidity.
Moisture can carry dissolved salts through masonry. When the water evaporates, salt deposits may appear at or below the surface and can accompany coating failure or masonry deterioration. Saturated masonry is also more vulnerable to surface loss in freezing conditions. A commercial masonry contractor’s condition-based discussion outlines these mechanisms, although a project involving recurring salts or deterioration warrants a qualified masonry assessment rather than diagnosis from a commercial comparison alone.
Vapor permeability may support drying in a compatible assembly, but it cannot compensate for active water entry. Coating a damp wall can conceal symptoms while the source continues.
Postpone decorative work until leaks, unstable masonry, and failed joints have been assessed and repaired. Let new repairs reach the age or condition required by both the repair-material manufacturer and the coating manufacturer before testing the finish.
Treat old coating removal as a separate project. Chemical stripping, abrasive cleaning, grinding, blasting, and pressure washing can damage brick faces or erode mortar. Determine what the coating is and obtain a project-specific removal specification before disturbing it; do not select a stripping method from a generic tutorial.
The appropriate response to contamination also depends on its source:
| Condition | Initial response | Do not coat when |
|---|---|---|
| Loose dust and cobwebs | Trial gentle dry cleaning or another method approved for the product and masonry | Material continues to shed or the surface remains unstable |
| Light surface dirt | Test the least aggressive compatible cleaning method | Cleaner residue or uneven contamination remains |
| Soot or cooking grease | Ask the coating manufacturer to approve the cleaning system and test for residue | Brick remains greasy, sooty, or nonabsorbent |
| Moss, algae, or recurring biological growth | Investigate persistent wetting and use a masonry-compatible treatment | Growth returns or the wall remains damp |
| Efflorescence or visible salts | Diagnose the moisture source and allow the condition to be assessed | Deposits recur or the masonry remains wet |
| Oil, unknown chemicals, or deep staining | Refer for specialist assessment and product-specific testing | The contaminant cannot be identified or isolated |
| Loose paint or failed coating | Determine the coating type and safe preparation route | Unsound layers remain beneath the proposed system |
Choose the finish before choosing the application method
“Limewashed brick” can describe several very different results. Decide which one you want before buying material or selecting a brush, roller, or sprayer.
Translucent wash
A light wash shifts the overall color while leaving substantial brick variation visible. The effect can be subtle, but inconsistent absorption will also be more visible.
Selectively distressed finish
A distressed finish combines coated areas with deliberately exposed brick. Controlled variation generally reads more coherently than random scrubbing across every unit. Selected faces, edges, corners, and recessed areas can be treated differently, but the pattern should make visual sense across the wall.
Naturally mottled mineral finish
This finish accepts variation caused by absorption, brushwork, drying, substrate repairs, and later weathering. It is neither fully transparent nor deliberately stripped back. If you expect factory-like uniformity, its natural variation may feel like a defect rather than a benefit.
Comparatively full coverage
Some commercial products and multi-coat systems can approach an opaque appearance while retaining mineral texture. “Full coverage” does not necessarily mean perfectly uniform color, concealed joints, or the appearance of acrylic paint.
Use this matrix to connect the desired finish with the application variables:
| Desired result | Application approach | Main control points | Main risk |
|---|---|---|---|
| Light or translucent | Product-approved thinner application, lighter coat, or more wipe-back | Dilution, absorption, brush loading, removal | Conspicuous unevenness |
| Selectively distressed | Apply consistently, then expose chosen areas while workable | Set time, water, rubbing pressure, pattern | Harsh transitions or over-distressing |
| Mottled mineral finish | Thin, controlled coverage with deliberate brushwork | Wet edge, section size, absorption, weather | Lap marks or unintended streaks |
| Fuller coverage | Approved mixture plus additional thin coats when permitted | Coat count, recoat time, joint coverage | Heavy buildup or loss of variation |
Do not assume that adding water has the same effect in every product. Dilution can change hiding, flow, working time, pigment distribution, and application behavior. A ratio published for one brand is not a universal formula.
Color may also look different while wet and can continue developing during early curing. Judge the test patch after the manufacturer’s stated evaluation period. Examine it in direct sun, shade, cloudy light, and—indoors—the room’s normal lighting.
Commercial ranges include whites, neutrals, earth tones, and grays, but color availability and custom tinting vary. If exact color and minimal mottling are priorities, compare compatible mineral silicate systems. A mineral-coating manufacturer describes silicate paint as the more opaque and uniform option in its limewash comparison, but that positioning should be verified against the specific product, substrate, and warranty rather than generalized to every silicate coating.
Plan a representative test patch, tools, and safe work area
A test patch is not merely a hidden spot used to decide whether the color is tolerable. It should reproduce the real project conditions.
Choose an area that includes:
- Representative brick faces
- Several mortar joints
- Typical texture and weathering
- A normal repair or variation, if present
- The planned cleaning and dampening method
- Similar sun, shade, wind, or indoor lighting
A hidden corner can serve as an initial trial, but an unusually sheltered or pristine location may not predict the visible wall. On an exterior with sharply different exposures, test a sunny elevation and a shaded elevation separately.
Record the following for every sample:
- Product name and batch
- Color
- Mixing or dilution ratio
- Water source if specified by the manufacturer
- Cleaning method
- Dampening method and amount
- Brush, roller, or spray method
- Number and approximate thickness of coats
- Time between coats
- Time before distressing
- Distressing tool and technique
- Air and substrate conditions
- Evaluation date
After the stated drying or color-development period, examine absorption, attachment, color, opacity, brick-to-mortar contrast, workability, lap marks, distressing response, and repaired areas.
Stop if the patch beads, slides, separates, shows persistent bare spots, releases readily after the stated cure period, or differs sharply across repairs. Ask the manufacturer whether it specifies an adhesion or compatibility procedure. Unusual, historic, sealed, or previously coated masonry may require specialist assessment even when a small patch initially looks acceptable.
Core tools commonly include:
- The selected limewash or complete coating system
- Clean water, if required
- Measuring containers
- Mixing bucket
- Manufacturer-appropriate mixing tool
- Masonry or natural-bristle brush
- Spray bottle or hose, where permitted
- Rags, sponge, or suitable brush for distressing
- Painter’s tape
- Drop cloths, plastic, or other protective coverings
- Containers and absorbent materials for drips
Some products permit rolling or professional spraying, often followed by back-brushing to work the coating into textured faces and mortar joints. A sponsored exterior project using one named limewash illustrates spraying and back-brushing, but its equipment, dilution, timing, and removal guidance should not be transferred to other formulations.
Protect windows, trim, metal, adjacent siding, roofing, paving, floors, furniture, plants, and landscaping. Plan how drips, overspray, and runoff will be contained. For elevated work, determine the access method before application so sections and stopping points can be completed without improvisation.
Read the product label, technical data sheet, and safety data sheet before opening, mixing, or spraying. Follow the listed requirements for protective equipment, ventilation, handling, containment, and cleanup. Spray application should proceed only when the product documentation expressly permits it and its specified controls can be maintained.
How to apply limewash to compatible brick
The following sequence is a framework, not a substitute for the selected manufacturer’s instructions. Those instructions govern dilution, dampening, coat count, recoat timing, weather, curing, and protection from rain.
1. Confirm repairs and approve the test patch
Verify that active moisture entry has been corrected, unstable materials have been repaired, and new masonry work has reached the coating manufacturer’s required condition or age.
Review the developed test patch in representative lighting. If adhesion, absorption, color, or joint coverage remains uncertain, do not begin the full wall.
2. Clean the masonry appropriately
Remove loose dirt, dust, debris, cobwebs, soot, biological growth, and incompatible loose coating. Use the least aggressive method that achieves the cleanliness required by the product without damaging brick or mortar or leaving residue.
Do not assume vinegar, acids, alkaline cleaners, bleach, abrasives, solvents, or pressure washing are universally appropriate. Cleaning must account for the brick, mortar, contaminants, adjacent materials, and selected coating system.
3. Protect adjacent surfaces and plan stopping points
Mask and cover surrounding finishes. Remove or protect hardware where practical. Establish logical stopping points at corners, downspouts, control joints, openings, or architectural breaks.
Size each section so a wet edge can be maintained without rushing. A large uninterrupted exterior may require a different crew or application strategy than an indoor fireplace surround.
4. Dampen only if the product requires it
Many commercial limewashes call for dampening porous masonry before application. The frequently described condition is evenly damp rather than saturated or dripping.
Other products may require a different surface condition. Follow the selected instructions rather than the blanket claim that all brick must be wet.
5. Mix according to the specified ratio
Measure rather than estimate. Mix until the material is uniform, reaching the bottom and sides of the container. Re-mix at the intervals stated by the manufacturer because mineral solids may settle.
Do not adopt a universal 1:1 recipe. Some products use or permit that ratio; others have different dilution ranges or arrive ready to use.
6. Work in manageable sections
Use the approved brush to work material across irregular brick faces, edges, recesses, and mortar joints. Brush direction, loading, and pressure affect the result. Varied or crisscross strokes may help prevent rigid striping where the product permits that technique.
Coordinate adjoining sections so one area does not dry far ahead of the next. Avoid stopping in the middle of a prominent uninterrupted field.
7. Build coverage with thin, controlled applications
Apply the approved amount rather than forcing final opacity through one unapproved heavy coat.
If additional coats are allowed, let the first reach the specified condition before evaluating the next. More coats may increase opacity while reducing the variation that attracted you to limewash.
8. Back-brush rolled or sprayed material when required
If rolling or spraying is permitted, follow the specified equipment, thinning, application, and safety instructions. Back-brush immediately or at the directed stage so the material reaches textured surfaces and joints instead of bridging over them.
Permission to spray one product does not establish that another product can be sprayed.
9. Allow the coat to set, then distress or recoat as permitted
Wait for the product-defined working stage. Distressing too soon may remove most of the coating; waiting too long may create hard edges or make removal difficult.
Evaluate a small section first. If another coat is planned, observe the stated recoat interval rather than relying solely on whether the wall feels dry.
10. Protect the finish through drying and curing
Keep the work within the product’s stated limits for temperature, sun, wind, humidity, rain, condensation, and substrate condition. Prevent contact, cleaning, soot, or abrasion until the manufacturer permits normal use.
Online instructions conflict because products and conditions differ. One guide may prescribe damp brick and one coat; another may require a different moisture condition and several thin coats. The current technical documents for the selected product on the tested substrate take priority.
Distressing, correcting, and removing limewash without damaging brick
Many commercial limewashes can be selectively removed with water and a rag, sponge, or suitable brush while the coating remains workable. That removal creates the familiar effect of exposed brick showing through a mineral wash.
Use a controlled method:
- Begin on the approved test patch.
- Dampen or wipe a small area gently.
- Expose less brick than you think you need.
- Step back and assess the overall pattern.
- Feather transitions between exposed and covered areas.
- Increase water or rubbing gradually.
- Repeat the same timing and technique across each section.
Temperature, humidity, direct sun, wind, substrate temperature, absorption, coat thickness, and formulation can all change the working window. Published periods ranging from minutes to days are product-specific claims, not universal rules.
Fresh-coating distressing differs from removing cured limewash. During the workable stage, water and modest rubbing may redistribute or remove material. After carbonation or full cure, removal can require substantially more effort and may affect brick faces or mortar.
Pressure washing requires particular caution. A commercial limewash application guide warns that pressure washers can damage brick and says pressure-assisted distressing should not be used on soft, older masonry. Weathered, low-fired, historic, or deteriorated brick and weak joints warrant the same stop-and-assess approach.
If the manufacturer permits pressure-assisted early removal on confirmed sound masonry, make a representative trial and follow that manufacturer’s directions. Do not borrow generic pressure, nozzle, or distance settings from another project.
Use these prompts when troubleshooting:
- Too opaque: Stop before adding water indiscriminately. Determine whether gentle wipe-back is still permitted or whether the coat must develop before correction.
- Patchy absorption: Check for sealers, contamination, repairs, inconsistent dampening, or different brick types.
- Streaks or lap marks: Review section size, wet-edge control, brush loading, wind, sun, and substrate suction.
- Poor attachment or powdery release: Stop and investigate cleanliness, coating history, porosity, moisture, compatibility, and curing conditions.
- Visible salts: Do not bury them under another coat. Investigate the moisture and salt source.
- Unexpected joint contrast: Test whether a later approved coat balances the appearance without erasing the desired brick variation.
When the symptom suggests a substrate or moisture problem, another coat is not the first remedy.
Adjust the workflow for exterior walls, interior brick, and fireplaces
The same product can behave differently depending on location, exposure, and use. Treat exterior elevations, interior decorative masonry, and fireplace surrounds as distinct projects.
Exterior walls
Direct sun, shade, wind, rain exposure, and substrate temperature affect suction, working time, apparent color, and future weathering. A shaded elevation may remain workable longer and age differently from a wall exposed to strong sun or wind-driven rain.
When exposures differ substantially:
- Test sunny and shaded areas separately.
- Schedule sections to avoid abrupt changes in drying.
- Establish stopping points before conditions shift.
- Consider whether access and landscaping make a consistent wet edge practical.
- Decide whether exposure-dependent weathering is acceptable.
Do not rely on generic weather limits. Use the selected product’s requirements for air and substrate temperature, humidity, direct sun, wind, condensation, and rain-free time.
Interior decorative brick
Indoor work avoids rain but introduces dust, soot, cooking grease, flooring, furniture, trim, ventilation, artificial lighting, and contact wear.
Clean contaminants without leaving residue or unnecessarily saturating the assembly. Protect floors because limewash may be thin and prone to dripping. Review the developed test patch during the day and under the room’s normal lamps; the perceived warmth or coolness of a white or gray finish may change with the light.
Follow the product documentation for ventilation, handling, drying, and return to normal use. A lack of weather exposure does not establish indefinite durability under rubbing, furniture contact, soot, grease, cleaning, or abrasion.
Fireplace surrounds
Separate decorative masonry around the opening from the firebox interior.
Approval for an interior brick surround does not establish suitability for direct flame, extreme temperature, combustion residues, or application inside the firebox. Meoded’s manufacturer guide permits its limewash on interior brick fireplaces but excludes the firebox, illustrating why location-specific product approval matters.
Before using a working fireplace, obtain documentation covering:
- Approved locations around the appliance
- Required separation from the firebox or direct flame
- Compatible substrates and prior coatings
- Drying and curing requirements before use
- Cleaning and maintenance limitations
Without explicit approval, keep the coating out of the firebox and direct-flame areas.
Maintenance, sealing, product selection, and realistic cost expectations
Exterior limewash may fade, chalk, become mottled, or develop a stronger patina. These changes can be part of the intended appearance, but they may look uneven if you expect consistent color.
Base maintenance on the appearance and condition you are willing to accept rather than a promised service life. One owner may welcome gradual exposure and variation; another may refresh the finish once elevations begin to differ.
Commercial longevity estimates vary widely. A painting contractor estimates approximately 5–10 years for exterior limewash, while Meoded states that its correctly applied product may last 10–20 years or longer. Both are commercial estimates—not independent guarantees—and they rely on different assumptions about substrate, preparation, coats, weather, and what counts as the end of useful service.
Variables affecting upkeep include:
- Brick and mortar porosity
- Existing condition and repairs
- Cleaning and preparation
- Product formulation
- Dilution and coat count
- Application workmanship
- Wall orientation
- Sun, rain, wind, and freeze-thaw exposure
- Pollution, splashback, and biological growth
- Tolerance for fading and variation
A sealer is not an automatic durability upgrade.
Use a sealer only when the manufacturer approves the complete combination for the substrate and exposure. Test the limewash-and-sealer system together because the final appearance may differ from the unsealed sample.
Build the budget from project-specific components:
- Masonry inspection and repairs
- Moisture investigation
- Cleaning and contaminant treatment
- Assessment or removal of old coatings
- Access, staging, and labor
- Masking and protection
- Verified product coverage on the actual texture
- Number of approved coats
- Tools and application equipment
- Test-patch material and waste
- Color samples or custom tinting
- Future touch-ups or refreshing
Do not treat contractor cost-per-square-foot figures as national standards. Repair needs, texture, access, masking, labor market, region, and coat count may outweigh the headline material price.
Compare products by:
- Explicit substrate compatibility
- Treatment of painted and sealed surfaces
- Required preparation
- Dampening and dilution instructions
- Verified coverage for the chosen texture
- Permitted application methods
- Color availability
- Coat and cure requirements
- Weather limitations
- Compatible primers, base coats, or sealers
- Warranty exclusions and conditions
- Availability of technical support
The final decision is both technical and visual. Limewash is most compelling on compatible absorbent masonry when you want a matte, texture-following, naturally varied finish and accept exposure-dependent weathering. Mineral silicate paint may better suit a more uniform, opaque mineral appearance. Conventional masonry paint and proprietary systems have separate preparation and compatibility requirements and should be evaluated as complete systems rather than interchangeable substitutes.
Proceed only when the brick and mortar are sound, the surface is compatible, and active moisture problems have been corrected. Confirm both appearance and application method with a representative test patch. Then follow the selected product’s current technical and safety documents—not a generic online formula.
Frequently asked questions
Can limewash be applied directly over painted or sealed brick?
Traditional limewash generally cannot bond directly to conventional paint or a sealer because those layers prevent contact with absorbent mineral masonry.
For painted brick, investigate an appropriate removal process, use a complete product-specific base-coat system if expressly permitted, or select another compatible coating. A proprietary base coat does not restore painted masonry to the behavior of bare brick.
For sealed brick, identify the treatment and obtain product-specific guidance. Do not assume aggressive washing, sanding, extra dilution, or additional coats will overcome the incompatibility.
Should brick be wet or dry before limewash is applied?
It depends on the product. Many commercial limewashes call for evenly damp masonry so absorbent brick does not pull water from the coating too quickly. Other formulations or substrates may require a different condition.
Follow the current technical data sheet and reproduce that condition in the test patch. “Always wet the brick” and “always apply to dry brick” are both too broad.
How long does limewash last on exterior brick?
There is no universal service life. Published commercial estimates differ substantially and are not independent guarantees.
Useful life depends on masonry condition, porosity, preparation, product, coat count, workmanship, climate, orientation, rain, sun, and how much fading or patina the owner accepts. Plan maintenance around appearance and wall condition rather than a fixed calendar date.
Can a pressure washer be used to distress or remove limewash?
Only in limited, product-specific circumstances—not as the default method. Pressure washing can erode mortar or damage soft, historic, low-fired, weathered, or deteriorated brick.
If the manufacturer permits pressure-assisted removal of its fresh product on sound masonry, test a representative area and follow its instructions. Fully cured limewash may be difficult to remove, and increasingly aggressive removal can damage the substrate before producing an acceptable finish.
Can limewash be used on a brick fireplace or inside the firebox?
Some products are approved for decorative brick fireplace surrounds, but surround approval does not establish suitability for the firebox, direct flame, or extreme heat.
Use limewash around a working fireplace only where the manufacturer explicitly approves it, and follow the documented drying and curing requirements before use. Unless the product instructions specifically allow firebox application, keep it outside the firebox and away from direct-flame areas.